


See my other free Gymnastic tutorials
What you need
- 4-way stretch fabric (dance fabric) in black and accent colors
- 5/8" FOE (foldover elastic) 1yrd
- 1/4" elastic 4" (for scrunchy) optional
- parchment paper (for design)
- needle and contrasting thread
- "Beads in a bottle" from Tulip (optional, for decoration)
How to make the leotard
1. Download pattern hereMake sure you have page scaling set to none !
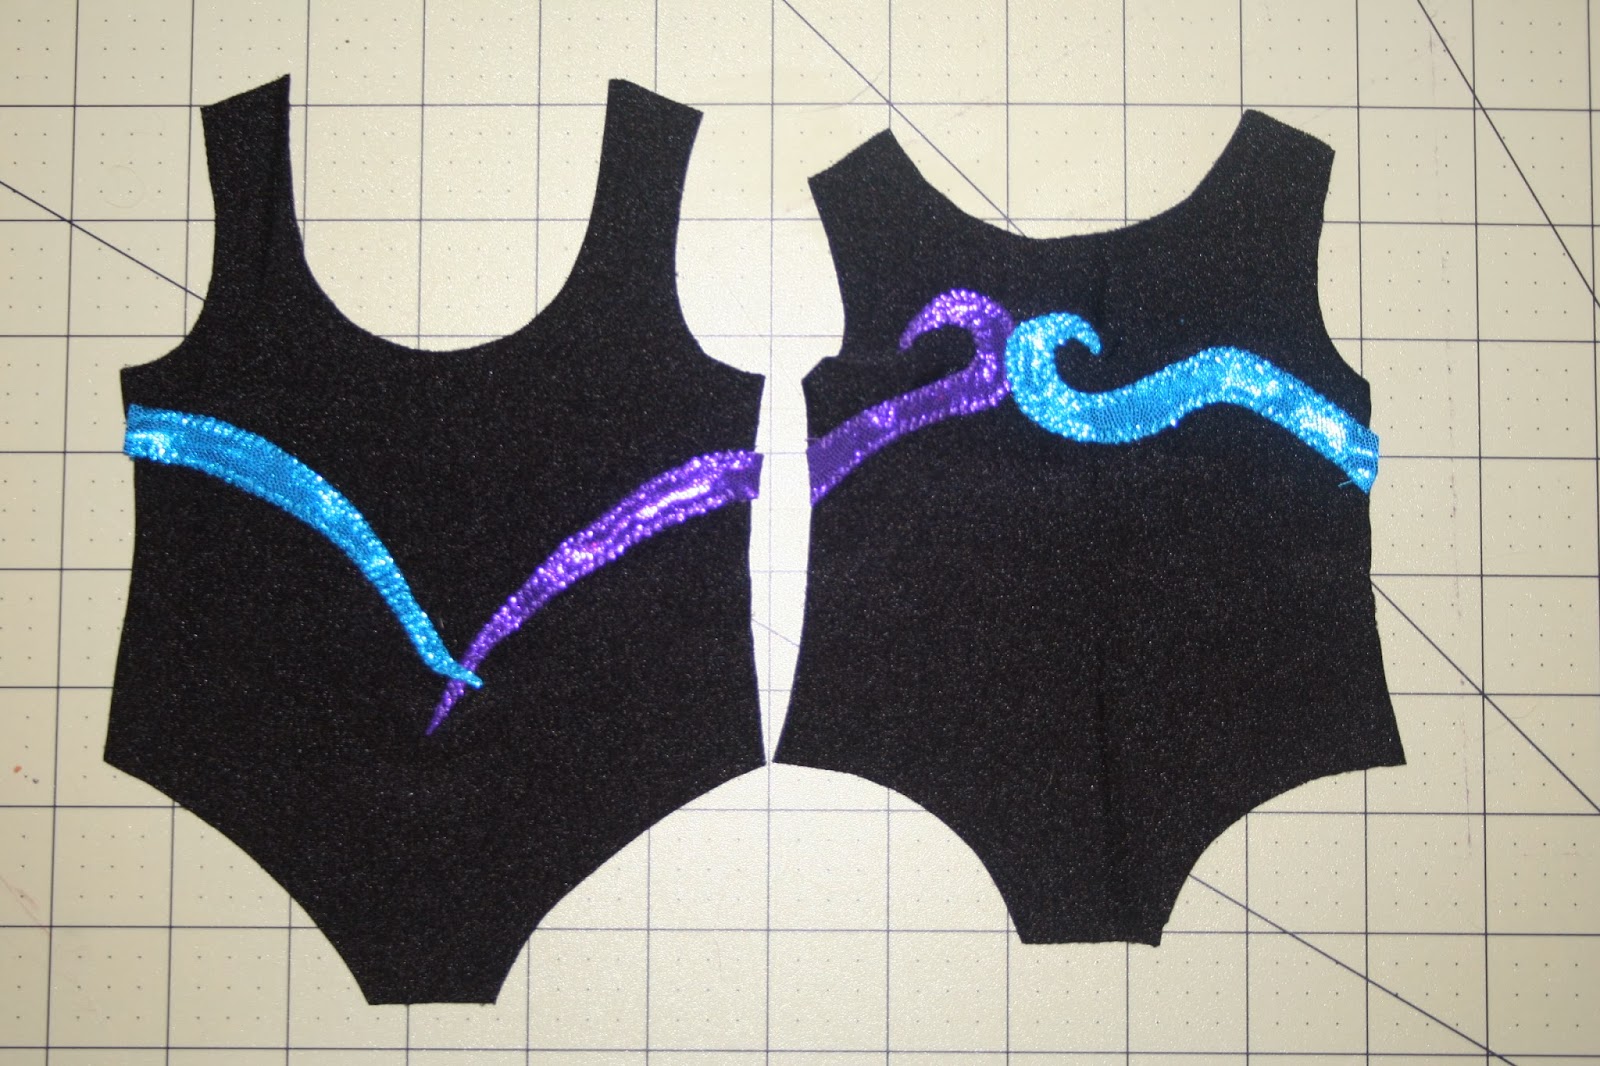
2. Turn front and back pattern over and draw your design on back
Notice how I increased the neck size from the pattern. The pattern gives you the neck outline
and a minimum suggested size.
It is your responsibility to make your neck opening at least as big as indicated in the pattern.
The bigger the opening, the easier it is to put the leotard on the doll.

3. Take parchment and trace your design, and cut out.
Make sure you have the back side matching up with the front.

4. Cut out design from stretch fabric.
Make sure your design template is on the fabric, the way it stretches.
5. Baste (hand-stitch) design onto front and back of leotard.

6. Applique with zigzag stitch (I used 1.8 for length and 3.5 for width).
Stitch the outside stitch part just outside the design along the border.

7. Sew one shoulder together (right sides together)

8. Sew FOE around neck opening

9. Sew other shoulder together (right sides together)

10. Sew arm sleeves on

11. Sew a 1/4" hem (fold up 1/4") on sleeve bottom on each sleeve

12. Fold leotard right sides together and sew sleeve and leotard side together.
Repeat on other side.

13. Sew FOE around leg openings

14. Sew between legs together.

15. I used "Beads in a bottle" from Tulip, to create the beads.
You are done !!!
How to make a scrunchy
1. Cut a rectangle 1 1/2" x 8"
2. Fold lengthwise, right sides together.

3. Sew along long side, leave 1" on either end.

4. Turn right side out.
5. Sew short ends together (right sides together)

6. Thread elastic through and sew elastic together

7. Sew opening shut

You are done !!!!


